
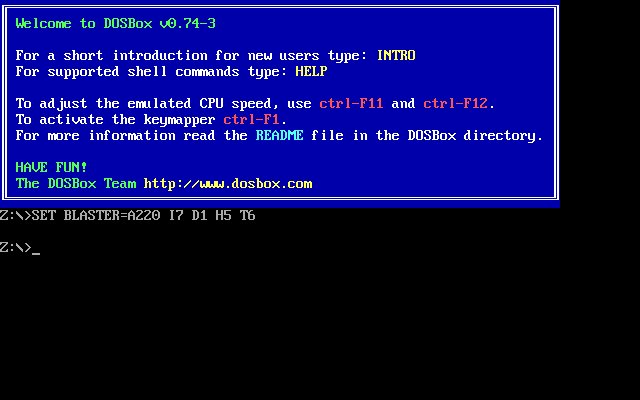
Every few months someone posts “how do I even run this” under a screenshot of a beige DOS installer, and the answer is almost always the same three-letter-adjacent tool: DOSBox. It’s not glamorous, it hasn’t had a stable release since 2019, and its default screen still looks like a black terminal window from another century. And yet it remains the most reliable way to get 1990s software running on hardware that no longer has a floppy drive, a Sound Blaster card, or a CPU slow enough to run Dangerous Dave at the intended speed. This guide covers installing it properly, understanding the handful of settings that actually matter, and fixing the problems that trip up almost everyone on their first attempt.
Why an emulator from 2019 is still the answer in 2026
DOS stopped being a consumer operating system decades ago, but the software written for it didn’t go anywhere. Old install disks, ISO rips, and abandonware archives are still floating around, and none of them run natively on 64-bit Windows, macOS, or Linux. DOSBox solves that by emulating the whole environment: the x86 processor, memory layout, graphics chips, sound cards, even the quirks of how DOS handled file names. Point it at a folder, tell it that folder is a hard drive, and it behaves like a real DOS machine from roughly 1993.
The core project, plain “DOSBox,” last shipped a stable build (0.74-3) in 2019 as a security patch — mainly a fix for a buffer overflow in batch-file parsing, not new features. Development on that codebase has effectively stopped. What’s kept the ecosystem alive since are two actively maintained forks, DOSBox Staging and DOSBox-X, both covered below. Knowing which one to install is half the battle, so that’s where this guide starts.
Installing DOSBox on Windows, macOS, and Linux
All three major variants — vanilla DOSBox, DOSBox Staging, and DOSBox-X — install in broadly the same way per platform, though the exact package names differ.
Windows
Grab the official installer from dosbox.com for vanilla DOSBox, or the equivalent installer/zip build from the DOSBox Staging or DOSBox-X project pages for a fork. Run it, accept the defaults, and you’ll get a DOSBox shortcut plus an “Options” shortcut that opens the configuration file directly — useful later.
macOS
DOSBox and its forks ship as standard .dmg disk images on their download pages; drag the app into Applications like any other Mac program. If you prefer a package manager, DOSBox-X is installable through Homebrew, which also handles updates going forward.
Linux
Most distributions carry vanilla DOSBox in their standard repositories. DOSBox Staging is distributed as a Flatpak through Flathub (flatpak install flathub io.github.dosbox-staging) and also as a Snap package. DOSBox-X publishes its own Linux packages and build instructions on its GitHub project for the bleeding edge.
DOSBox vs. DOSBox Staging vs. DOSBox-X: picking the right one
This is the question almost every new user skips, then regrets. The three aren’t interchangeable — each targets a different priority.
| Version | Best for | Trade-off |
|---|---|---|
| Vanilla DOSBox | Compatibility with existing guides and pre-made configs written against it over the years | No stable release since 2019; missing fixes the forks have merged |
| DOSBox Staging | Wanting it to just work — better defaults, cleaner audio, active development | DOS only; won’t run DOS-based Windows |
| DOSBox-X | Accuracy and deep configurability, including booting Windows 3.1/9x/ME on top of it | More settings to get lost in, more ways to misconfigure it |
If unsure, DOSBox Staging is the safest default for pure DOS gaming in 2026 — it inherited vanilla DOSBox’s compatibility while smoothing the rough edges. Reach for DOSBox-X when a game, or a full DOS-based Windows install, needs hardware behavior Staging doesn’t emulate closely enough.
Inside dosbox.conf: what it is and where it hides
Every DOSBox variant reads settings from a plain-text config file, and anything changed in the in-app menu can be set here permanently. Location differs by platform and variant:
- Windows, vanilla:
C:\Users\<you>\AppData\Local\DOSBox\dosbox-0.74-3.conf(AppData is hidden by default — enable “show hidden items,” or use the Start Menu shortcut the installer creates) - Windows, Staging:
C:\Users\<you>\AppData\Local\DOSBox\ - Windows, DOSBox-X:
C:\Users\<you>\AppData\Local\DOSBox-X\dosbox-x-<version>.conf - macOS, vanilla:
~/Library/Preferences/dosbox-SVN.conf - macOS, DOSBox-X:
~/Library/Preferences/DOSBox-X <version> Preferences - Linux, Staging:
~/.config/dosbox/ - Linux, DOSBox-X:
~/.config/dosbox-x/dosbox-x-<version>.conf
Can’t find it? Staging and DOSBox-X both support a command-line flag (--printconf for Staging, -printconf for DOSBox-X) that prints the exact path in use.
Inside, settings are grouped into bracketed sections — [sdl] for the display/window, [cpu] for emulation speed, [sblaster] and [midi] for audio. The one you’ll touch most, and the safest to experiment in, is [autoexec] at the bottom — anything typed there runs automatically on startup, which is where mount commands belong so you don’t retype them each time.
The cycles setting, actually explained
This is the single most misunderstood option in the program. The cycles setting in [cpu] controls how many emulated CPU instructions DOSBox tries to run per millisecond — a stand-in for “how fast is this virtual computer,” with no fixed relationship to real megahertz or your host CPU’s clock speed.
Three practical modes:
cycles=auto(default) — switches to maximum speed when it looks safe. Fine for most modern-friendly software that doesn’t care about exact timing.cycles=max— runs as fast as your real CPU core allows. Sounds like the obvious choice, but it’s exactly why “max isn’t always best”: DOS-era games often assumed a specific, slow CPU, so at full modern speed their timers, physics, or scrolling can run absurdly fast or break outright. It also pins one CPU core at 100% the whole time DOSBox is open.cycles=fixed <number>(e.g.cycles=fixed 3000) — locks emulation to a constant instruction rate, ideal for games sensitive to speed or needing consistent timing.
In practice: if a game plays in fast-forward, don’t blame your machine — set a fixed, lower cycle count. If it’s sluggish, raise the fixed number, or try max with a cap (cycles=max limit 50000). You can also nudge cycles live, without editing any file, using the in-app hotkeys — handy for finding the sweet spot before committing a number to the config.
Mounting drives: getting your files into DOS
DOSBox doesn’t see your real file system until told to. The core command is mount, which maps a folder on your actual computer to a drive letter inside the emulated session:
mount c C:\Games\MyOldGameThat makes everything inside that folder appear as drive C:. For CD-based games distributed as disc images, the companion command is imgmount, which mounts an image file instead of a folder:
imgmount d C:\Games\MyOldGame\disc.iso -t isoThe -t iso flag tells DOSBox to treat the file as an optical disc image rather than a raw hard-disk image. If a game needs multiple discs swapped mid-install, list several image files after the drive letter and cycle between them with Ctrl+F4.
Common first-timer mistakes: forgetting mount commands don’t persist between sessions unless placed in [autoexec]; mounting the wrong folder level (the folder containing the install files, not its parent or a subfolder); and trying to mount a drive letter that’s already in use, which DOSBox simply refuses.
Getting the sound right
Sound is where old DOS software gets fussy, because audio hardware in the DOS era wasn’t standardized — a game had to be told exactly what card it was talking to. DOSBox emulates a Sound Blaster card by default, matching the settings almost every early-90s game assumed and hardcoded: base address 220, IRQ 7, and DMA channel 1 (plus high DMA 5 for 16-bit audio). These live in the [sblaster] section as sbbase, irq, dma, and hdma, alongside an sbtype setting (sb1, sb2, sbpro1, sbpro2, sb16) that picks the specific model to emulate. Leave these on defaults unless a game’s own setup utility asks for something different — many older titles don’t let you change these values anyway, which is exactly why 220/7/1/5 became the universal safe answer.
Beyond Sound Blaster, some games — particularly RPGs and adventure titles from the early-to-mid 90s — support Roland MT-32 or General MIDI output for richer music. These are two different, non-interchangeable standards: the MT-32 predates General MIDI and uses its own proprietary instrument set, so a game set to “General MIDI” won’t sound right through MT-32 emulation and vice versa. If a game offers “Roland MT-32 with Sound Blaster,” take it — it typically layers digital sound effects on top of MT-32 music. For General MIDI quality beyond DOSBox’s built-in synth, point the [midi] section’s mididevice setting at a SoundFont file (.sf2 or .sf3).
Two things cause most audio problems on a first run: forgetting to run the game’s own audio setup program (often SETUP.EXE or SNDSETUP.EXE) after installation, and picking a sound card option in that setup program that doesn’t match what DOSBox is actually emulating.
Troubleshooting: common problems and their fixes
| Problem | Likely cause | Fix |
|---|---|---|
| Game runs far too fast | cycles set too high, often via cycles=max |
Switch to a fixed count and lower it, e.g. cycles=fixed 3000; adjust with Ctrl+F11/Ctrl+F12 |
| Game is choppy or sluggish | Cycle count too low, or auto not detecting properly |
Raise the fixed number, or try cycles=max limit <number> |
| No sound at all | Game’s internal audio setup wasn’t run, or points at the wrong card | Run SETUP.EXE/SNDSETUP.EXE and select Sound Blaster at the default address/IRQ/DMA |
| Music sounds wrong or garbled | Game set to General MIDI but DOSBox routed to MT-32, or vice versa | Match the in-game music device to whatever [midi] is actually emulating |
| Can’t find installed files after mounting | Mounted the wrong folder level | Mount the folder that directly contains the game’s files, not its parent or a subfolder |
| Settings don’t stick between sessions | Mount/imgmount typed manually instead of saved | Add them to [autoexec] in dosbox.conf |
| CD-dependent game won’t see the disc | Disc image mounted without the correct type flag | Use imgmount with -t iso, matching the drive letter the game expects |
A minimal config worth starting from
Rather than hand-tuning every section blind, start from a small, known-good template in [autoexec] and adjust per game:
[cpu]
cycles=fixed 3000

[autoexec]
mount c C:\Games\MyOldGame
c:
cd \
GAME.EXE
exit
This mounts the game folder as C:, launches the executable, and exits cleanly when you quit rather than dropping you back at a bare prompt. Raise or lower the fixed cycle number until animation and music timing feel correct — that one number solves more “why is this broken” reports than any other setting in the program.
Straight Answers to the Questions Everyone Asks About DOSBox
Why is DOSBox running so slow?
Almost always the cycles setting. Try raising a fixed cycle count, or switch to cycles=max temporarily to confirm your machine can handle the game before dialing back to a specific number.
How do I exit DOSBox?
Type exit at the DOS prompt, or close the window; in full-screen, Alt+Enter toggles back to windowed mode first.
Can DOSBox play CD audio from a game disc?
Yes, when the disc image (mounted via imgmount) includes actual CD audio tracks — many mid-90s games used real audio tracks for their soundtracks rather than MIDI.
Do I need DOSBox-X instead of regular DOSBox to run old Windows software?
Yes — DOSBox-X specifically supports booting DOS-based Windows versions (3.1, 9x, ME). Vanilla DOSBox and DOSBox Staging are DOS-only and won’t boot those.
Is it safe to leave the config file on its defaults?
For a lot of software, yes — DOSBox Staging’s defaults in particular are tuned to work reasonably well out of the box. Custom cycle counts and sound settings become necessary mainly when specific software misbehaves at the default speed or card configuration.
None of this requires memorizing the whole manual. Get the right variant installed, understand what cycles actually does, mount your files correctly, and match the sound card settings — that combination covers most of what breaks when people first try to get a DOS game running again. Individual game guides on the site, like the one for Prince of Persia, build on exactly these fundamentals.